Tuesday, January 31, 2012

Bubble Skirt

I have two girls and at all times must be fair to both and treat them equally :P.  At Christmas I made a three-tired skirt for my 3 year old and the eldest got jeans.   She needed them but she wondered when she was going to get a new skirt.  So for Valentines Day the youngest will get jeans while the 6 year old will get a skirt. 
The fabric is Crosshatch in Grey ordered from Hawthorne Threads. The name is misleading because it is definitely not grey!   More of a blue jean colour that looks good with the heart top I found on clearance at Gymboree before Christmas.
I looked for tutorials online but in the end just made it up myself.  It's basically a waistband piece with an outer skirt attached to an inner tube of knit to make it a bubble skirt (or pumpkin skirt as it was called when I wore one back in Grade 7!).  I think the shape is super cute and can't wait to see it on. 

Sunday, January 29, 2012

Honey Blouse - Take 2

I do really like the style of the Honey Blouse pattern by Make it Perfect.  I made it last fall and I like that version but it is a bit big.  This time I made a medium and I think it's better, especially in the shoulders.
The fabric is a really lightweight shirting and it's totally see through.  The whole time I was making it, I kept berrating myself for the choice because I might be too self conscious to wear it, even with a cami underneath.


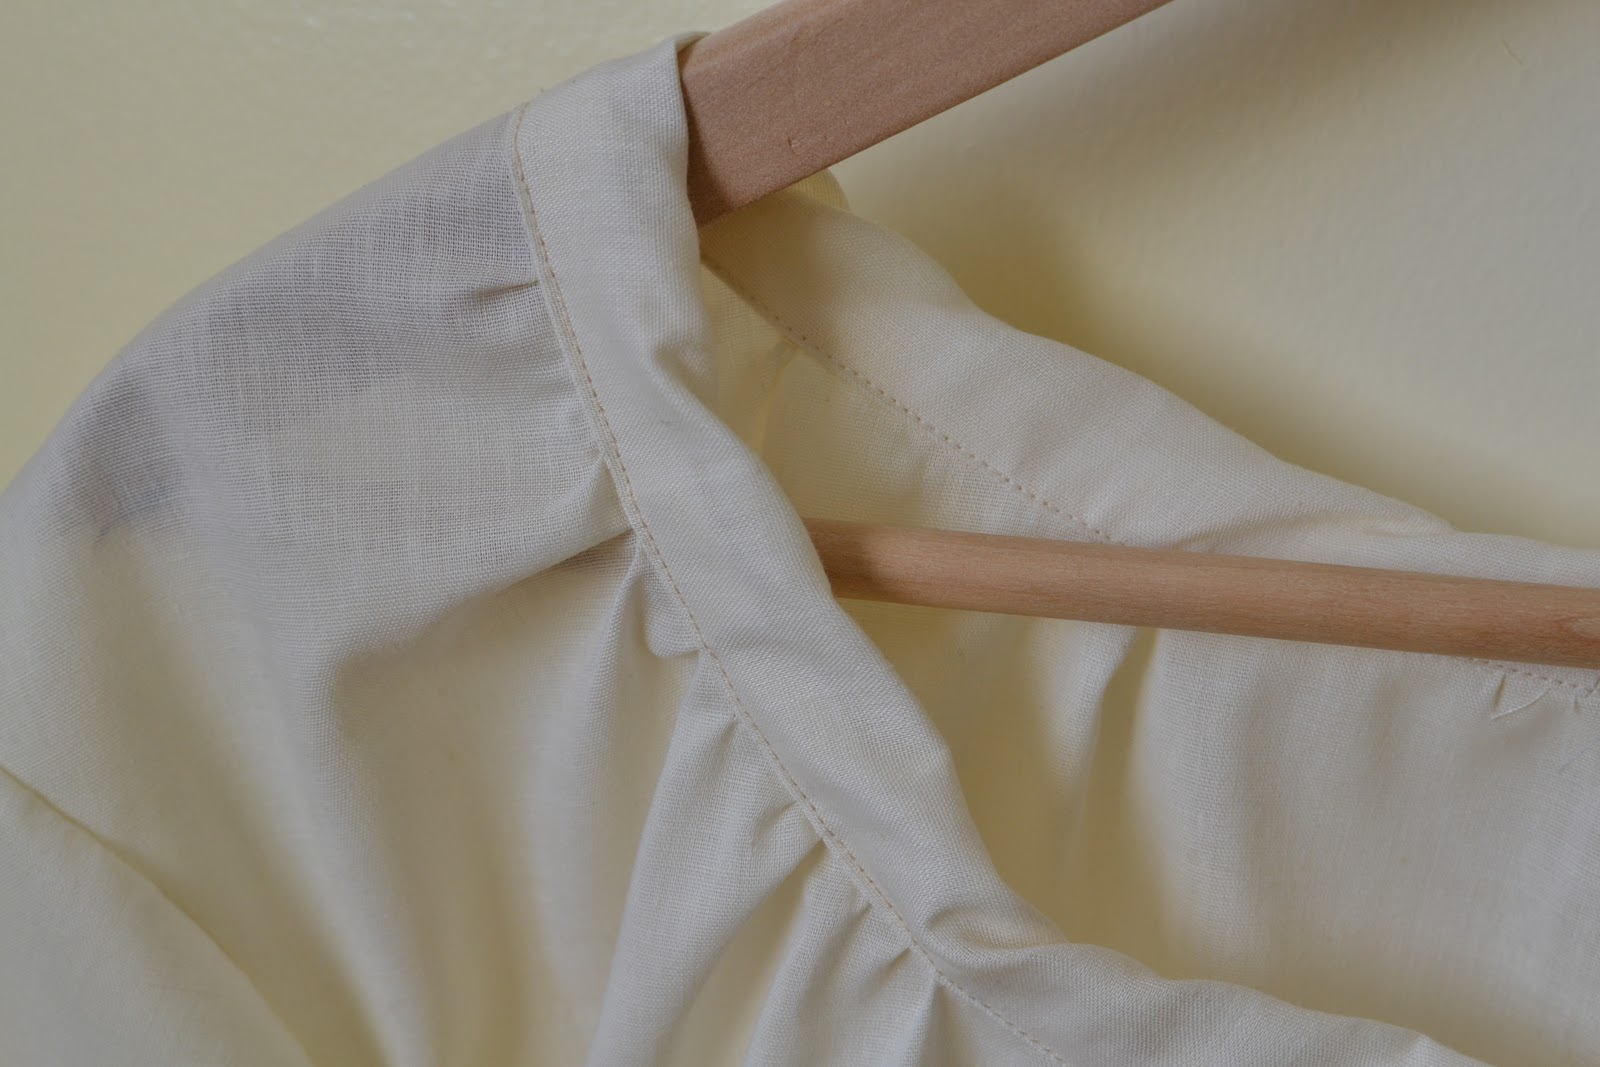
Instead of following the directions for attaching the neck, sleeve and waist bands, I enclosed the seam allowances in the bands by topstitching.  Probably would have been more successful had I actually had the right colour thread but, hey, if I'd waited 'til I had the right colour, I might would never have finished it :). 

Although I like the style (and so does my husband!  That's saying something because he never makes comments about what I sew), the shoulders of this blouse are still bugging me.  I think it would look better with raglan sleeves or at the very least with the neckline gathers only in the front and back and not on the shoulders.  Next time?  I don't know if I'm done with this pattern yet -- I would like to try it in knit. 

Edited (June 2012): I think Vogue 8581 works better for me.  See it here in knit, I plan to try it in a woven, too. 

. . . .

totally unrelated, I ordered some Liberty cotton lawn the other day.  I saw it was on sale online, put it into my cart and then couldn't bring myself to actually order it.  When I woke up in the morning, I was still thinking about it and it was still available so I bought it: $65 for 2 1/2 yards  *gasp*.   Now to try to find something worthy of making.  Maybe a Jasmine?

Thursday, December 29, 2011

New Nighties

We used to always get new jammies at Christmastime so I wanted to carry that tradition on with my girls.  They are girly-girls at heart -- that means dresses chosen over pants and nighties over pjs.  Not many stores carry nighties, though, or if they do they are not nearly long enough or ruffly enough. 

This pattern runs big, really big.  I learned from last year and made a size 2 with size 3 length for my 3 year old and a size 3 with about 4 inches extra length for my 6 year old. 

The fabric is Folksy Flannel Coloring Garden in Berry and Fortune Sunset ordered from fabric.com for under $5 a yard.  The prints are a bit loud but the fabric is super soft.  And the best part is that the kids coordinate without being matchy-matchy.  (Although I may have went over the top with the pockets and the piping and bias trim I added to the 6 year old's.  The only reason I didn't do the same to the 3 years olds is that she is supremely picky and I was worried she would find the added bulk at the yoke uncomfortable.) 

It's a very easy pattern -- no closures so it comes together quickly.  I really like the neckline and think it would make a cute summer dress, too.  Mostly though, I'm just happy that they are happy with them.  My littlest would rather stay in her new nightie than get dressed to go out! 

Friday, December 23, 2011

Teacher gifts

Teachers work hard, especially at this time of year -- the kids are so squirrley, I'm glad they're in school this week!   Hopefully a little handmade gift will let these two teacher's know how much I appreciate what they do for our little ones every day. The fabric for both of these gifts is from my cloud 9 giveaway win.

First, I made a little tote bag using the poochie bag tutorial at Happy Zombie.  It's very cute and a great way to show off fat quarters.  I love the addition of the pockets to the outside, and it's a great size for a teacher to carry notebooks or papers. 


The other teacher received a fully lined zippered box pouch that I made from the tutorial over at It's a Pretty Modern Life.  I wanted to be all fancy and show off two fabrics on the outside but I didn't take into account how the fabric would go round the edges --  I had to make the corners deeper so the second fabric wouldn't carry over to the side.  It ended up being more squat than the tutorial as a result but still very functional, I think.  I added quilt batting to the back of the outside which helps keep the shape but still keeps it really soft and squishy.

O + S Cozy Winter Hood

This bear hat from Little Things to Sew was such a quick and satisfying project -- just what I needed to lift my spirits after I realized I didn't have time to make all the things for Christmas that I had on my list :). 

The outside is fleece coating (is that the right word??  It dosen't sound right) left over from the big hoodie I made last year. It's soft and holds it's shape well without being too thick.  The lining is from a terry towel sheet I bought a couple of years ago on clearance (my plan was to make beach robes but that never quite happened, lol). 

I'm never sure how things I make will be received by my littlest but this one was a hit.  She calls it her mouse hat and I agree, the colours definately make it more mouse than bear. 

I made medium but I think small would have been better.  (She's almost 4 and according to the book, medium fits size 4-6).  It took me under two hours to make so I may make another. 

I added a tab so that it could be buttoned up as that's a bit more practical than a bow for playing outside.  Miss Thing chose the button, which may have helped in the acceptance of the hat ;).  Although she loves it, it's been hard to get a decent picture of her in it: here she's shoveling the driveway.  She always has her tongue out when she's concentrating so obviously shoveling's tough work!


edited to add: I made a second in small and it fits much better.  Although I do think the ears are pretty cute on this one, I actually followed the directions on the second hat and they are even cuter.   Now to try to get a picture . . .

 Here's the smaller size, it's much better. 

Monday, November 28, 2011

Oliver + S Backpack

I waited for months for my library to get a copy of Little Things to Sew.  In the end I broke down and bought it and I'm glad I did!  It's a great book, filled with projects I can't wait to make.   This is a variation of the penguin backpack that I made for my niece.  It will coordinate with her quilt, bag keeper and diaper and wipes case.  Hopefully my brother and his wife like this fabric, I've never actually asked them, lol!  But, really what's not to like?

The main body is Far Far Away II, the piping and lining is gabardine. It's my first time doing piping and it definately takes a few extra steps but I love how it finishes it off!


The straps are gabardine too with quilt batting inside.  My local fabric shop didn't have the right size plastic strap adjusters so I bought metal ones.  They look good but I felt the straps needed a bit of extra bulk to make sure they don't slide out.  I also added a couple of lines of stitching to make them a bit stiffer and hopefully easier for my niece to get into.


As is usual with O+S, the pattern is great.  There are lots of steps and, because of limited space in the book, less diagrams than a regular pattern but the instructions are well written so it's easy to follow.  And I think the result looks great. 

My only regret is that I chickened out of my original plan and didn't add batting to the body of the bag.  I was worried about having too many layers to stitch through but it would have made the bag less floppy. 

Tuesday, November 8, 2011

Honey Blouse

I have a shirt I really like and tried to replicate myself in the summer before I realized that I don't really like drafting patterns :).  Then I saw the Honey Blouse pattern from Make It Perfect, which is not exactly the same but has the same feel.  Here's my version in Wrenly Wildfield Cobalt from Pink Chalk Fabrics:

I agree with pretty much all the points raised in this great review here (too bad I didn't read it before making my blouse!).  In particular, for the cost, I fully expected full size pattern pieces, not ones I had to piece together and trace.  Also, it really would have been nice to be given the rectangular pieces as pattern pieces rather than just as measurements so that I save on fabric. 

Mostly though I disliked the method of attaching the neck, arm and waist bands.  In the pattern the seam allowances are exposed and you are told to "machine neaten".  That's not necessary -- you can use the bands to enclose the seam allowance for a much nicer finish.  Next time!


I do really like the style and think I will wear this lots.  It does fit quite generously, though, so next time I make it I think I'll try a medium.

edited (June 2012): I've worn this a few times but have not really been pleased with the fit.  I haven't worn my second version at all (although that's partly due to the fabric).  Vogue 8581 works better for me.  I've made it in knit here and plan to try it in a woven, too.  

Ironing Board Cover

My mom asked me to make her a new cover for her ironing board, which is homemade and an odd size.  It was given to her by a boyfriend when she was 17 (what a strange gift!  I don't know the story but I really should ask her about it).   She has a hard time finding covers that aren't too big so she gave me the dimensions and I whipped one up.  Because she lives so far away, I wasn't able to try it on myself so hopefully it does actually fit.   I debated the pros and cons of piecing it but in the end decided I liked the variety of fabrics and figured that the seams shouldn't affect the function too much. 

The large scale print in the middle is MoMo Freebird from Hawthornethreads.  The others are fat quarters from I won in a Cloud 9 giveaway.  It's pictured here on my ironing board, which is a standard size. 

Wednesday, October 26, 2011

Yet more Butterick B4320

The starting point for this costume was a moment of weakness in Dress Sew in Vancouver.  I was drawn to this beautiful brocade because of the colours but also because of it's lovely weight and drape.  In my head, I justified the $10/metre cost with the thought that the girls' dress up dresses get more wear than their regular clothes do.  I gulped at the thought of spending $30 on a Halloween costume but bought 3 metres because it's only 36 inch wide.

Again, I made View C, this time with the matching sleeves (on a side note: isn't it amazing how totally different it looks with different fabric?)


I don't care how pretty it is, never again will I sew with brocade!  You just have to look at it and it ravels.  I used a Hong Kong seam  finish for seams that have to lie flat and bound (binded?) the other seams in bias tape.  I started off with high hopes for how pretty this was going to be but got lazy and messy after only a few seams. 
It's not that I begrudge the time this type of finish takes (although that is part of it), it's that I started having this sinking feeling that even after all this work, this dress is not going to make it much past Halloween.  I hope I'll be proven wrong but the topstitching is already looking iffy and it hasn't even been worn yet. 


I will definitely try a Hong Kong finish again, though.  I think with the right colour binding, matching thread and a bit of patience (all conspicuously absent in this project!) it could look fantastic. 

Monday, October 24, 2011

More Ghastlies -- Halloween bags!

I am still not working (boo!) so have time to do silly things like make bags for the kidlets to collect their treats in on Halloween.  This one is about 14" wide by 14 1/2" high and is lined for durability -- if we let them my girls will trick-or-treat long past the time most kids have given up!!